To calculate Live Rates with Smart Boxing, dimensions for all of your products must be present. Dimensions for multiple products can be uploaded to Smart Boxing by using a CSV file that can be created from the Packages page. Dimensions for individual products can be entered directly into the Smart Boxing app.
Dimensions For Multiple Products
When you first begin using Smart Boxing, or when you add several new products to your store, we recommend adding dimensions for multiple products at one time.
Export Products To CSV
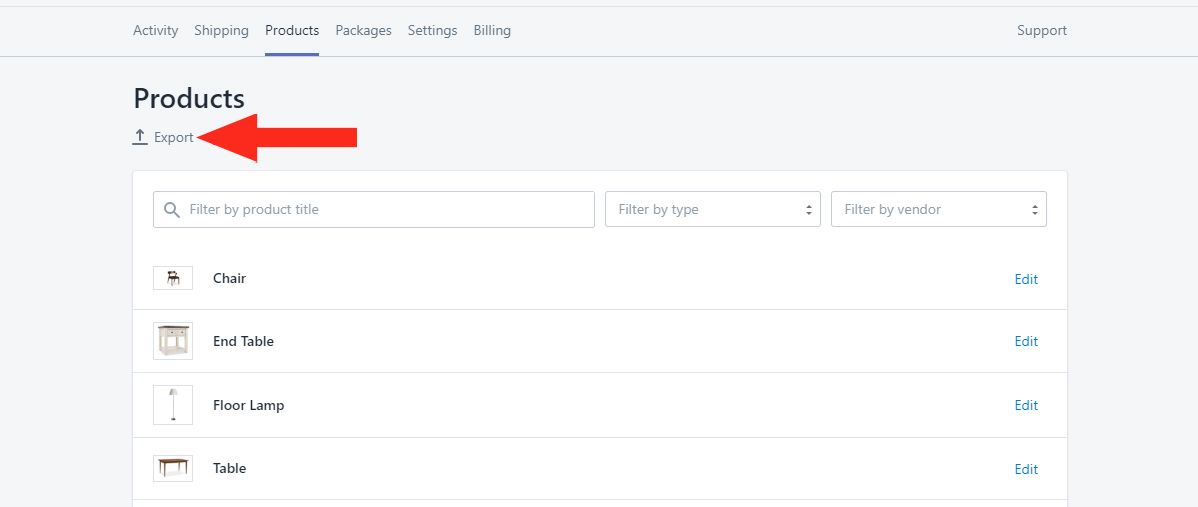
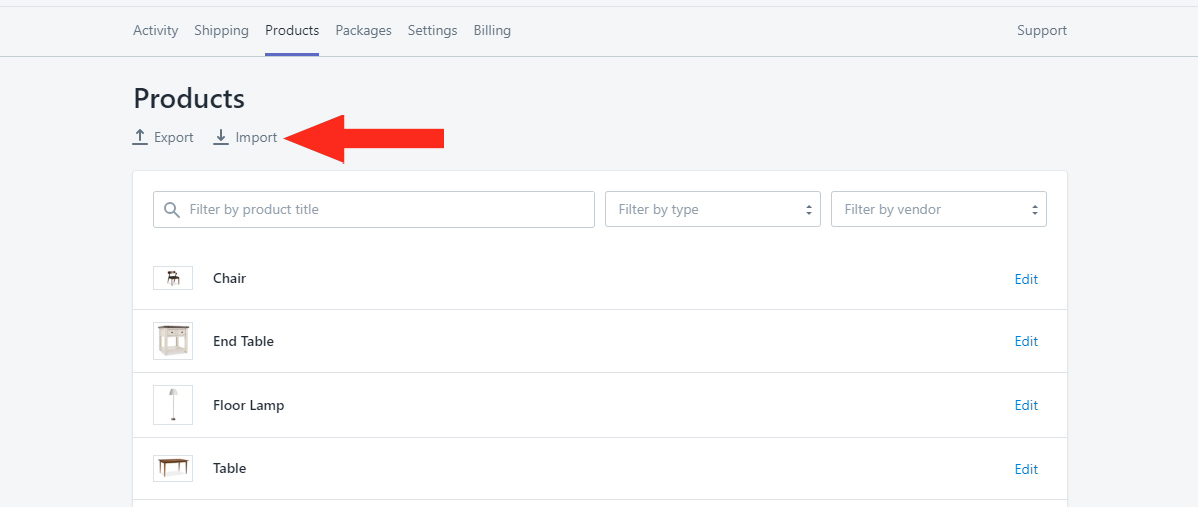
Click Products on the main menu.

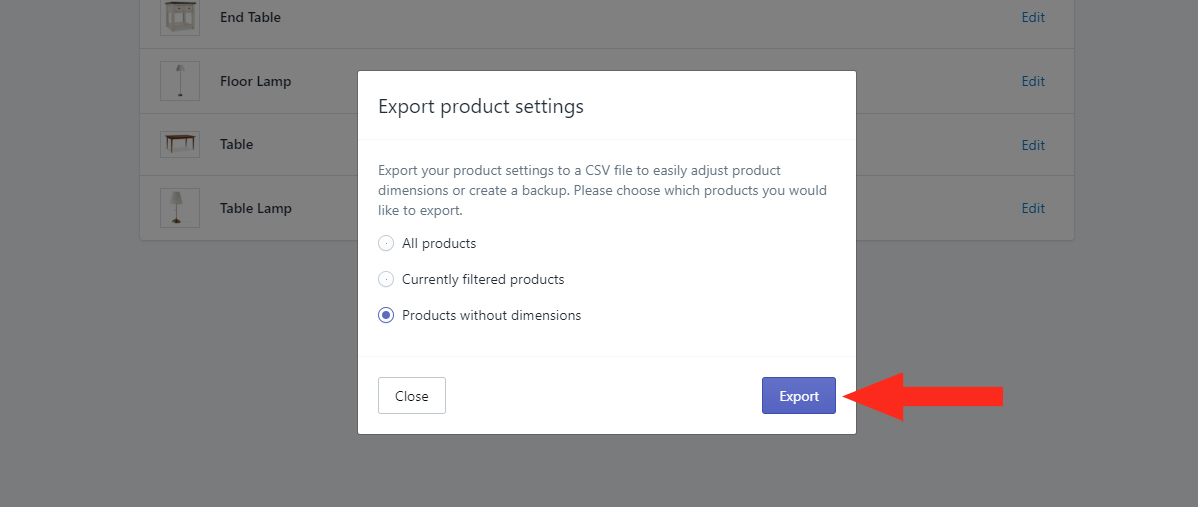
You can export all products at once, only products that are filtered, or only products without dimensions.
Export All Products
All products that have been synced with Smart Boxing will exported using this method.
1) Click Export to download your Products list as a CSV file.
2) Leave All products selected, then click the Export button.

Export Filtered Products
Only products that you have filtered will be exported using this method.
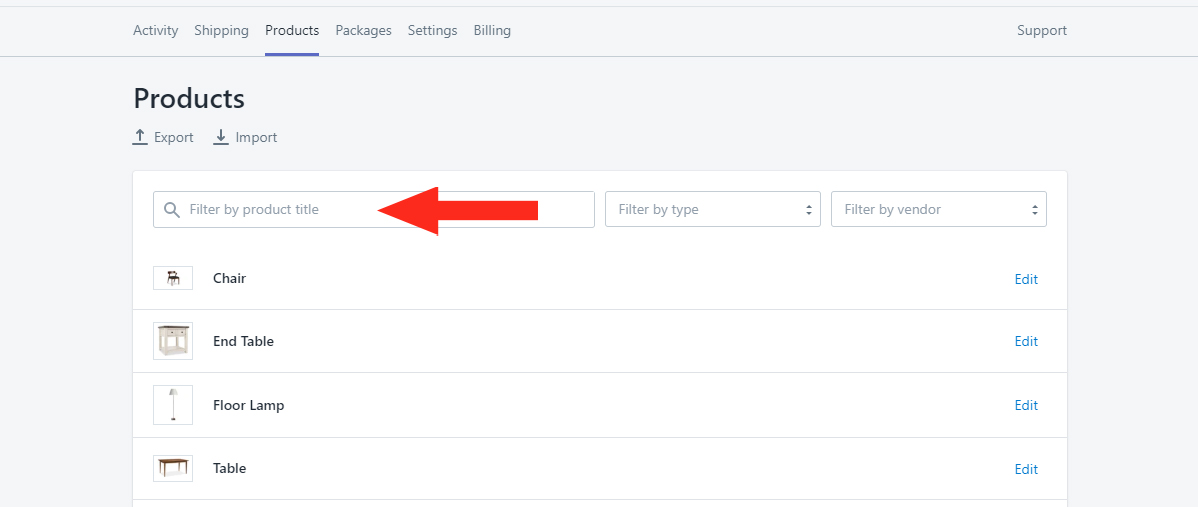
1) Filter products by Title by typing the name of the product into the search bar.
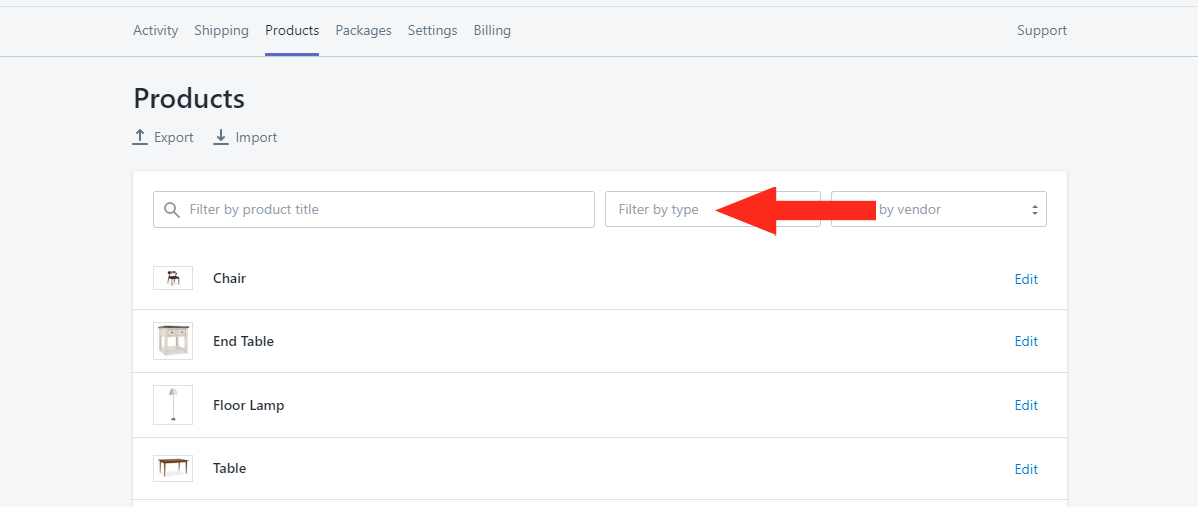
2) Or, filter products by Type by selecting the type from the drop-down list.
3) Or, filter your products by Vendor by selecting a vendor from the drop-down list

5) Or, filter your products by any combination of Title, Type and Vendor.
6) Click Export to download your Products list as a CSV file.
7) Select Currently filtered products, then click the Export button.

Export Products Without Dimensions
Only products that have not yet been assigned dimensions will be exported using this method.
1) Click Export to download your Products list as a CSV file.
2) Select Products without dimensions, then click the Export button.
Locate and Save The CSV File
1) Find the email containing the CSV file attachment.
2) Open the CSV file using a spreadsheet program – e.g. Microsoft Excel.
3) Save the file to your computer.
Add Product Info
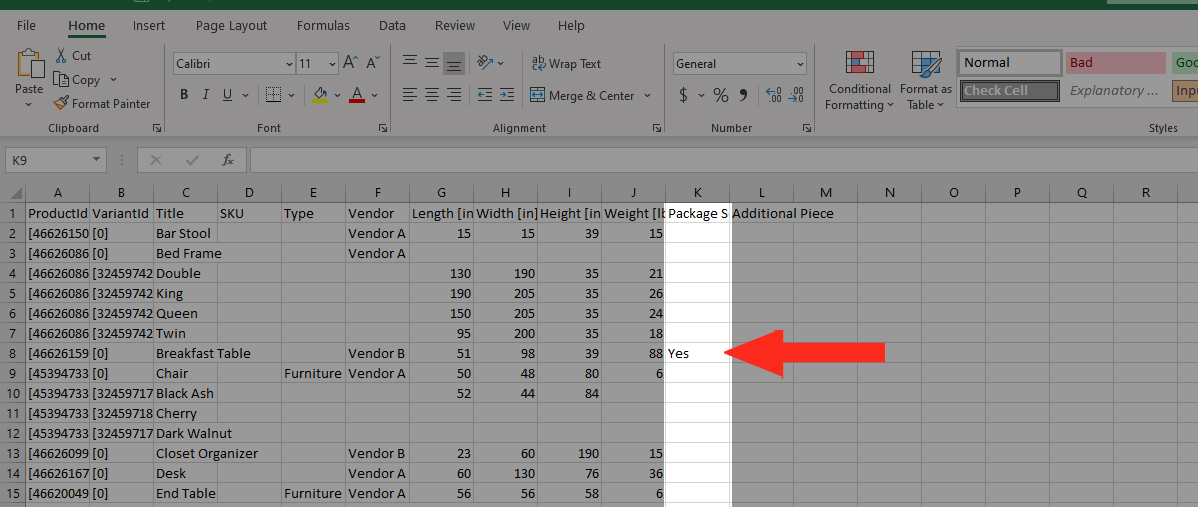
1) In the CSV file, under columns G, H, I and J respectively, enter the Length, Width, Height and Weight of the shipping size of each Product and Variant – e.g. if a t-shirt is folded to dimensions 12 x 8 x 1 inches, that is the shipping size.
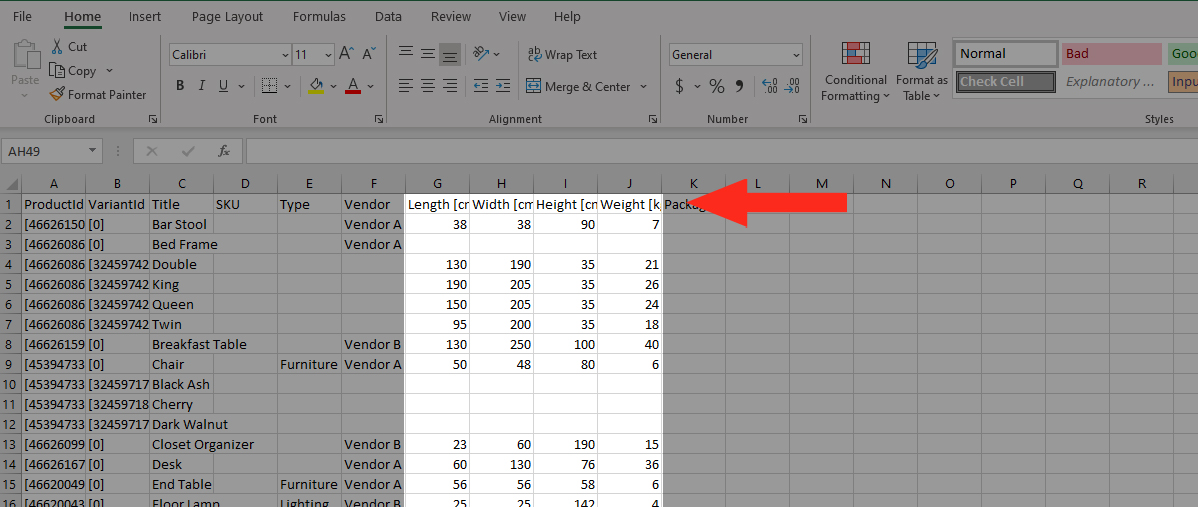
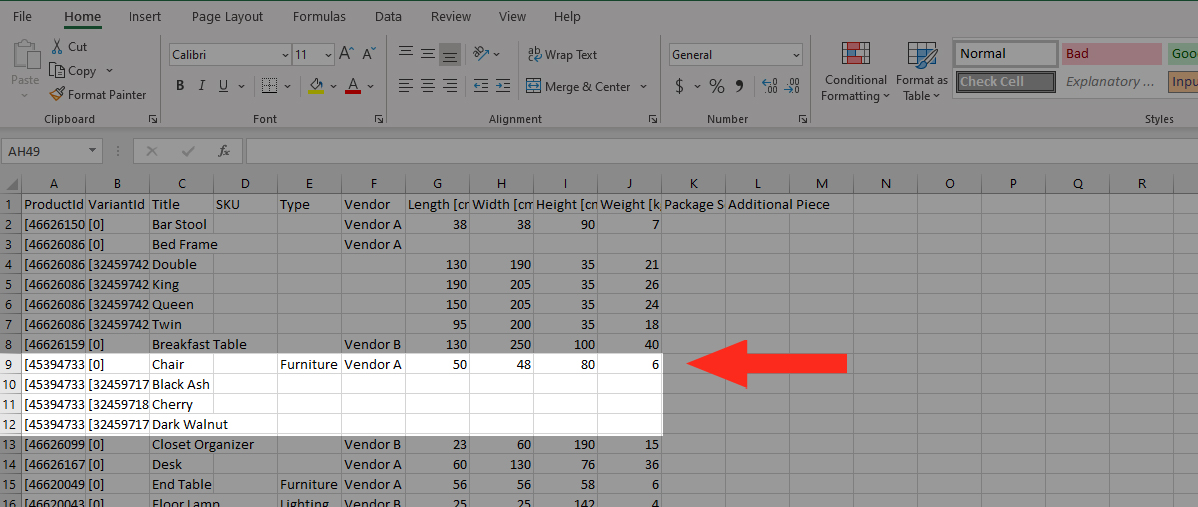
2) Under column K, enter ‘Yes‘ if the product needs to be packaged separately. Otherwise, leave blank if the product can be packaged with other products.
3) Save the CSV file. Remember the file name and folder location where the file is saved.
Import Your Product Dimensions
1) Go back into Smart Boxing.
2) If you’re not already on the Products page, click Products on the main menu.
3) Click Import to upload your Products list as a CSV file.
4) Click Choose File to select the saved CSV file from your computer, then click the Import button.
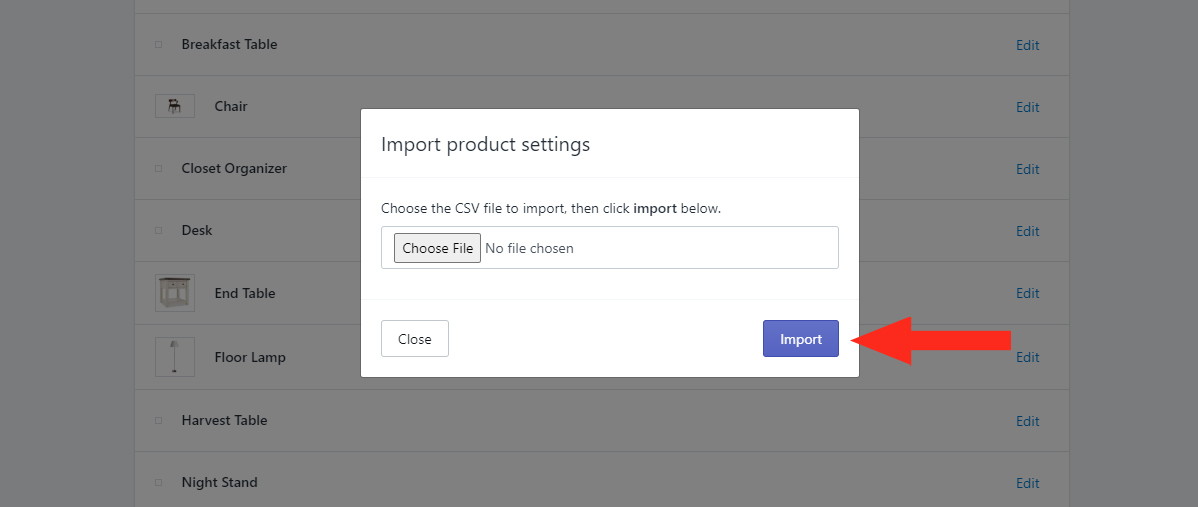
5) Check to make sure your Product dimensions have been added by clicking Edit beside any product that was included in the CSV import.

Dimensions for Individual Products
When adding just one or two products, it may be easier to simply add the dimensions to Smart Boxing directly through the product management interface.
Add Dimensions & Weight
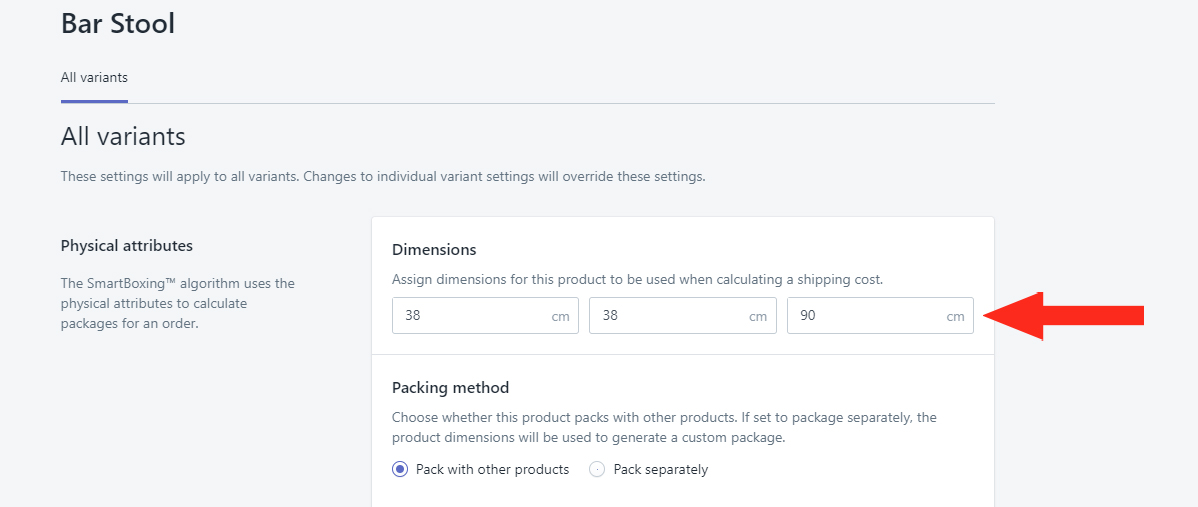
1) Click Edit beside a product that requires dimensions.
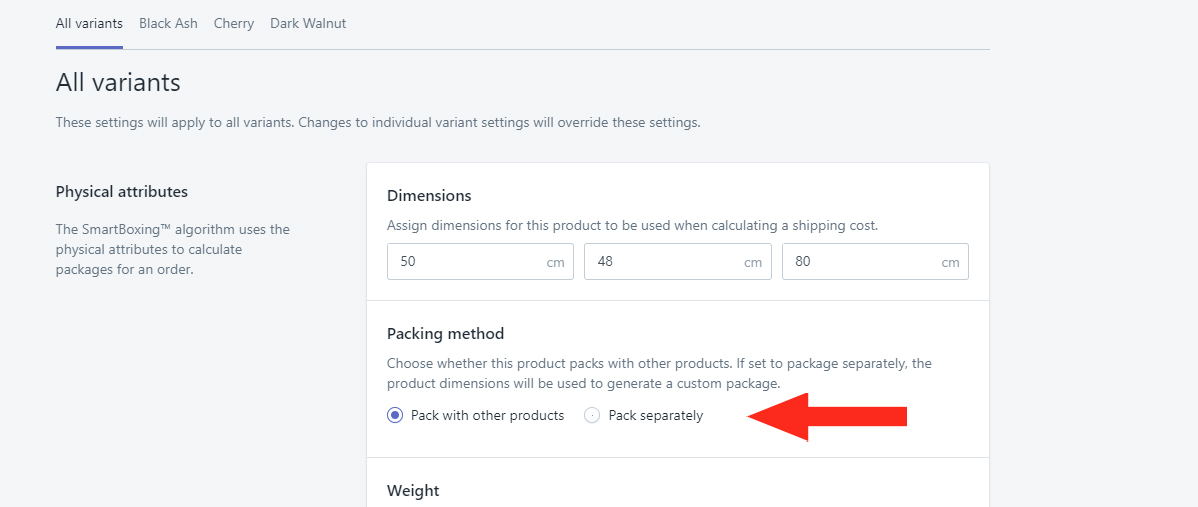
2) Add the Length, Width and Height of the product. Adding dimensions to All variants will apply the same dimensions to each variant.
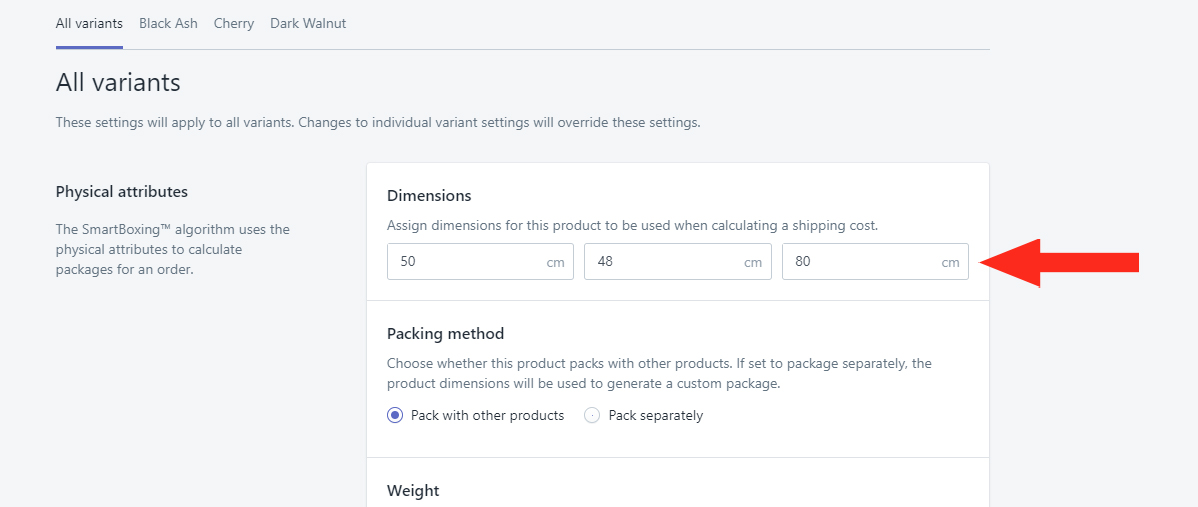
3) To add unique dimensions to any variants, click on the variant label, then add Length, Width and Height.
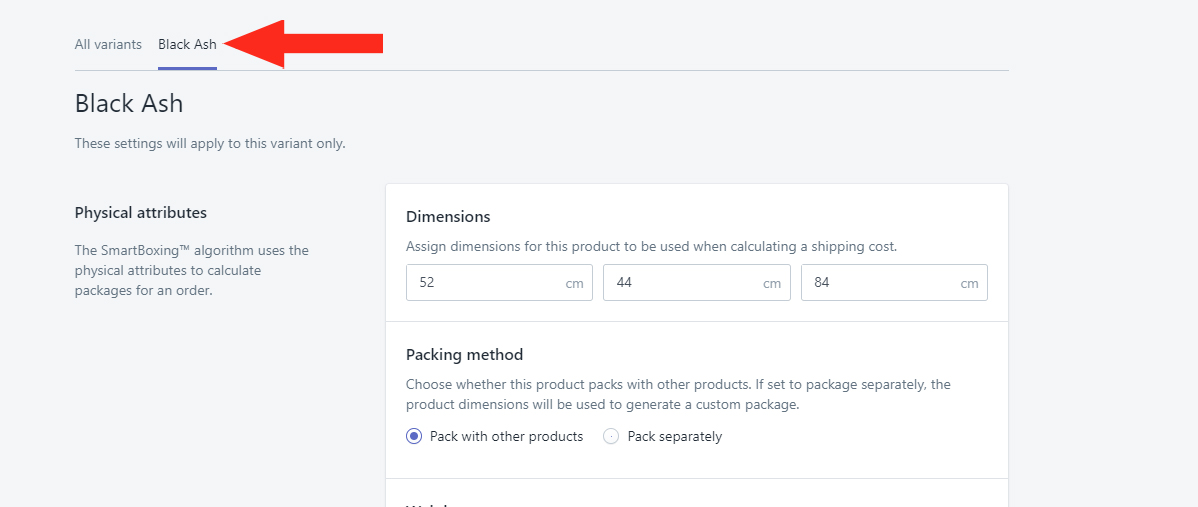
3) Choose whether the product can be packed with other products or if it needs to be packaged separately. Products are set to be packaged with other products by default.
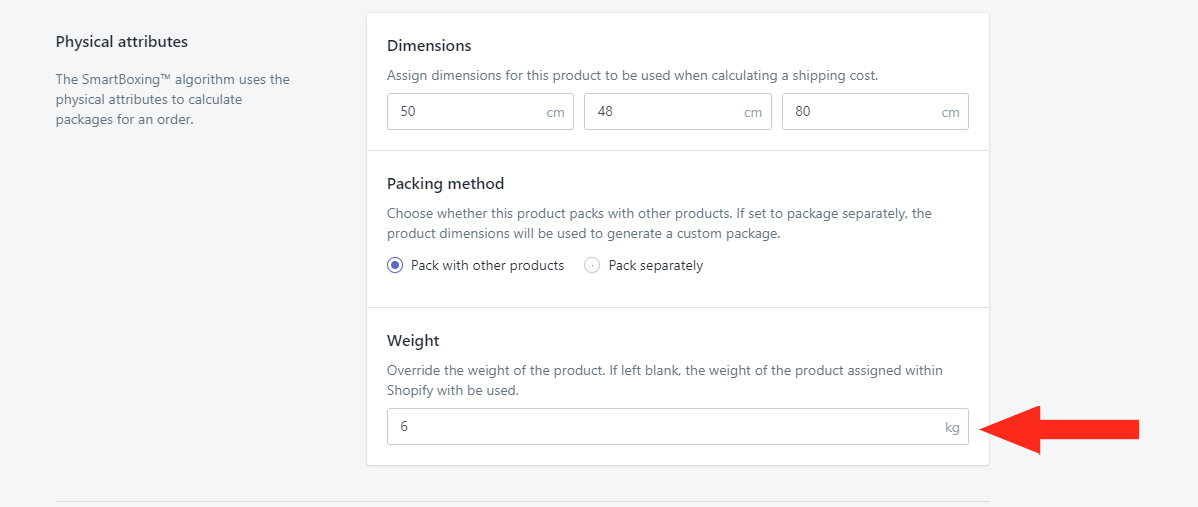
4) Add the Weight of the product. Adding weight to All variants will apply the same weight to each variant.
5) To add unique weights to any variants, click on the variant label, then add Weight.
6) Click the Save button.
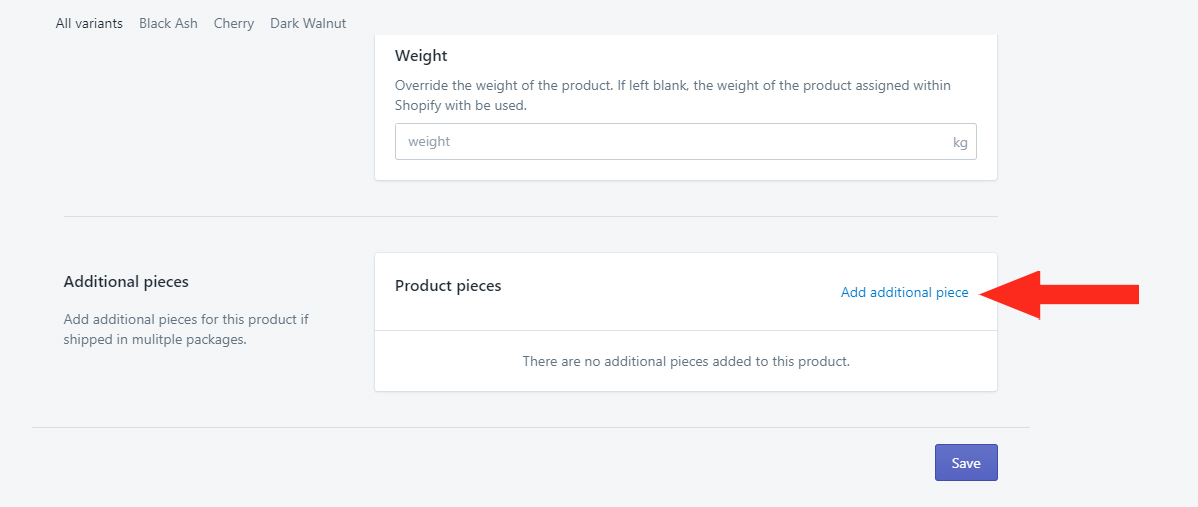
Dimensions for Additional Pieces
If you have a product that needs to be shipped in pieces – e.g. a table with four legs – you can add dimensions for each individual piece. This can be done directly through the app interface or by editing the CSV file used to add dimension to multiple products.
Add Additional Pieces To Through Interface
1) Click Edit beside the product that requires dimensions for additional pieces.
2) In the Additional pieces section, click Add additional piece.
3) Enter a Title for the product piece – e.g. ‘Leg 1’.
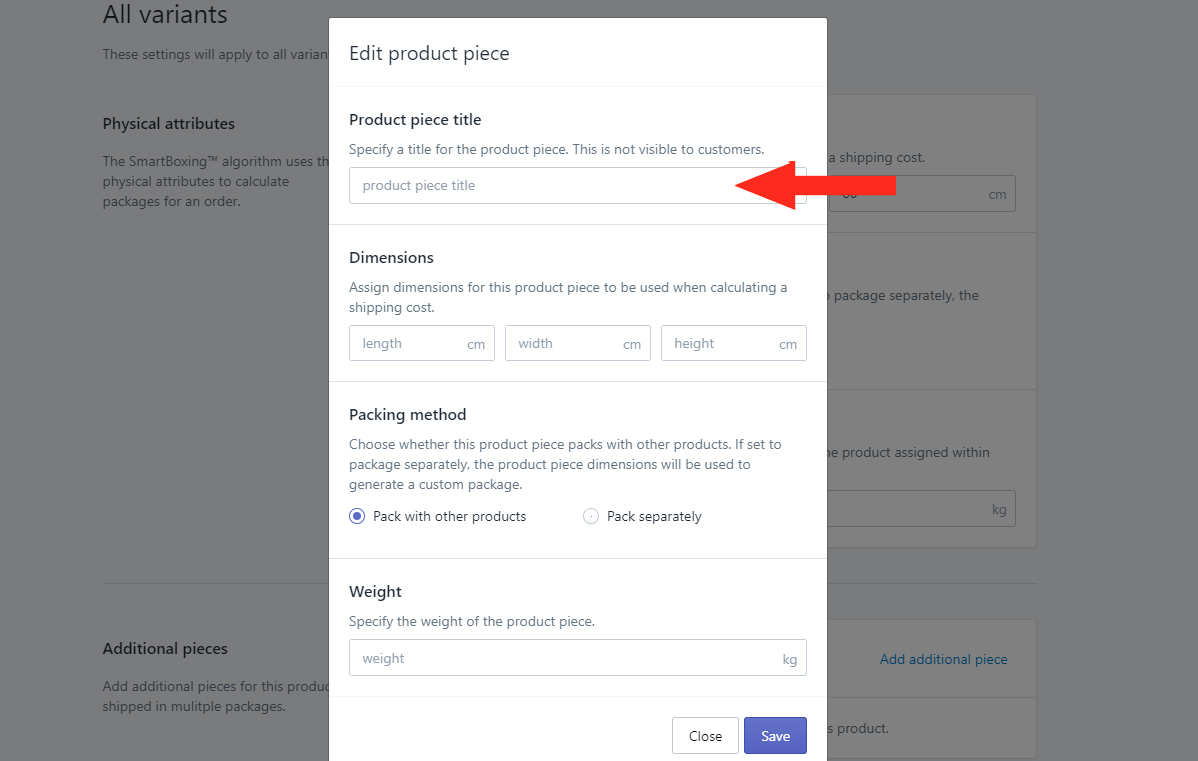
4) Add the Length, Width and Height of the product piece.
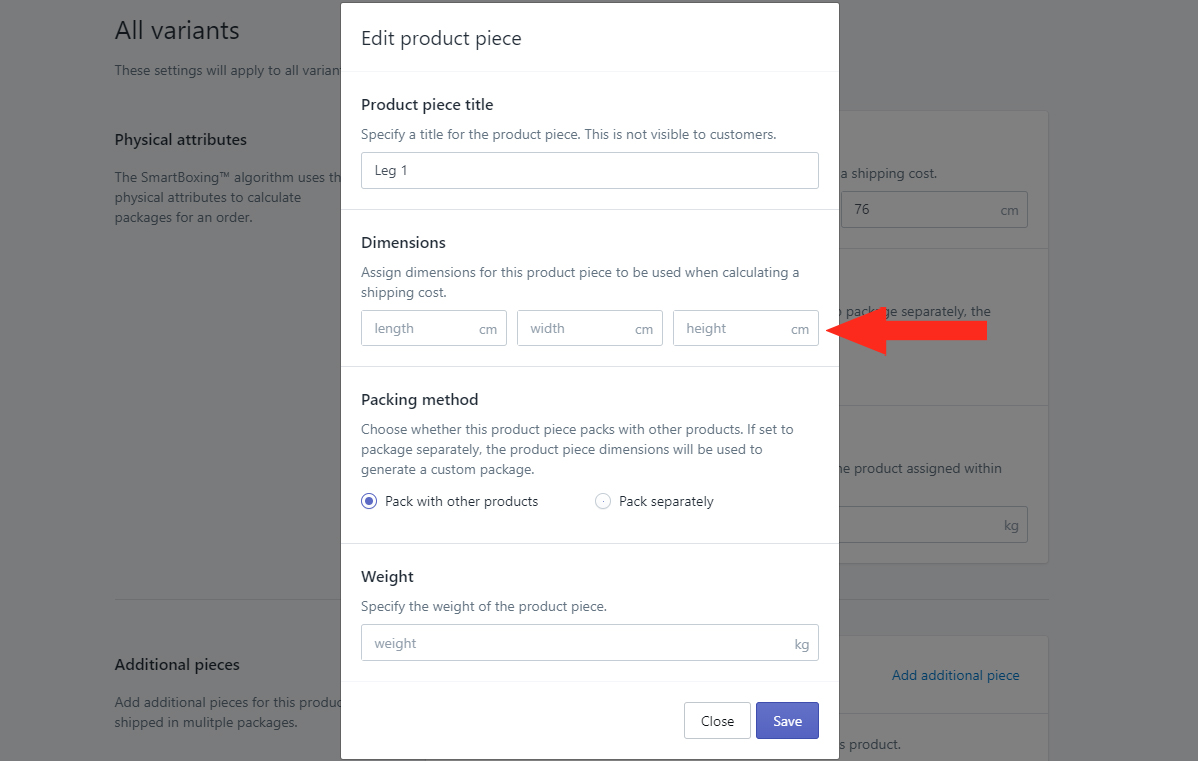
5) Choose whether the product piece can be packed with other products or if it needs to be packaged separately. Product pieces are set to be packaged with other products by default.
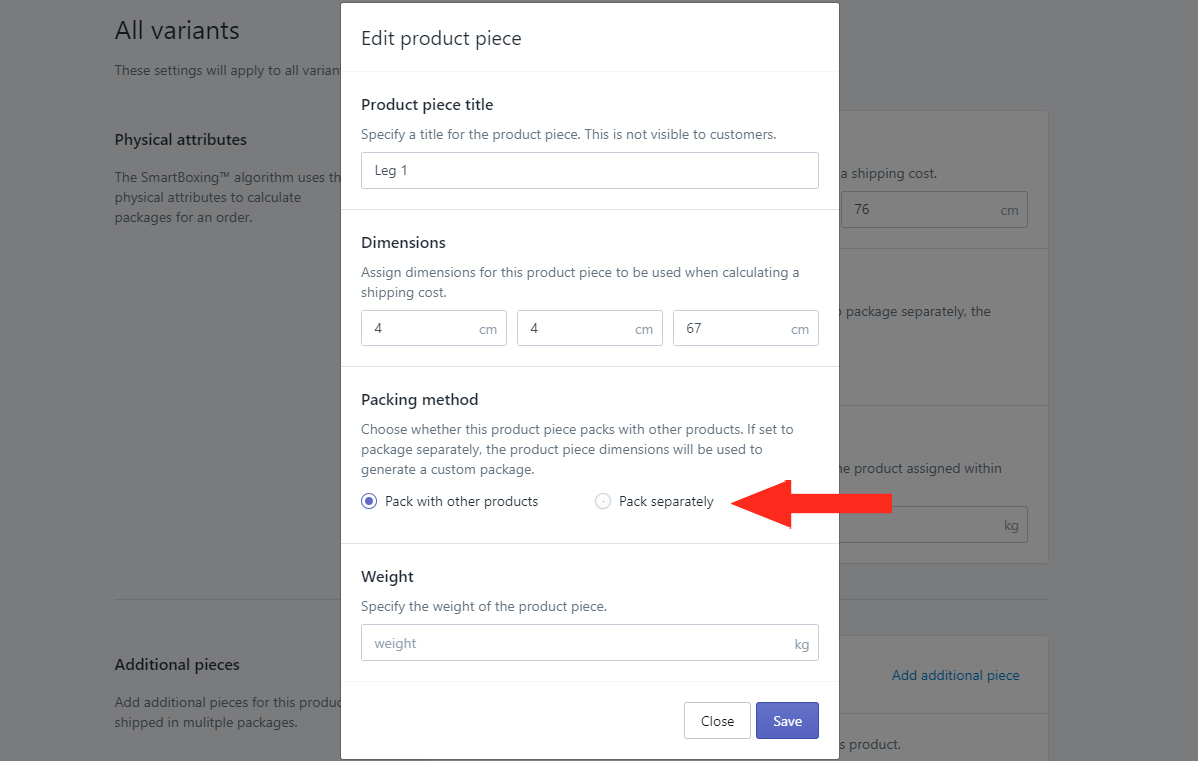
6) Add the Weight of the product piece.
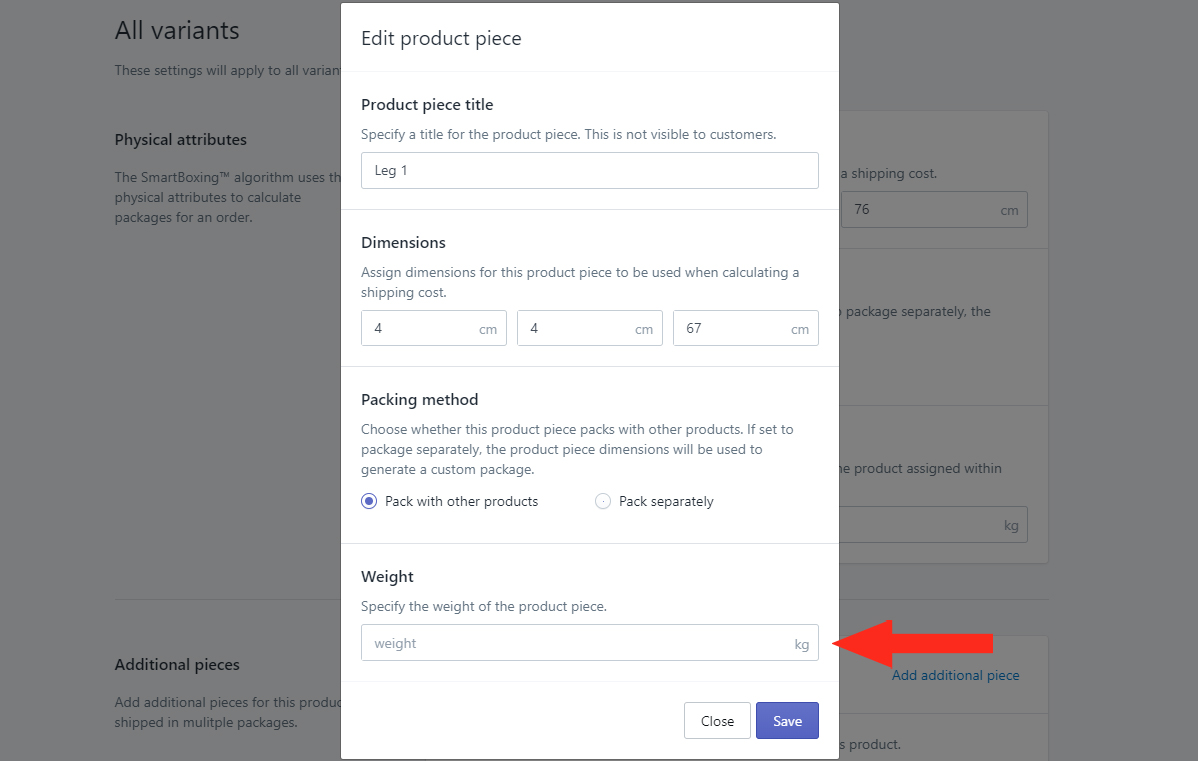
7) Click the Save button.
Add Additional Pieces With CSV File
1) Follow the steps to export products to CSV.
2) When adding product info to the CSV file, insert a row below the main product listing.
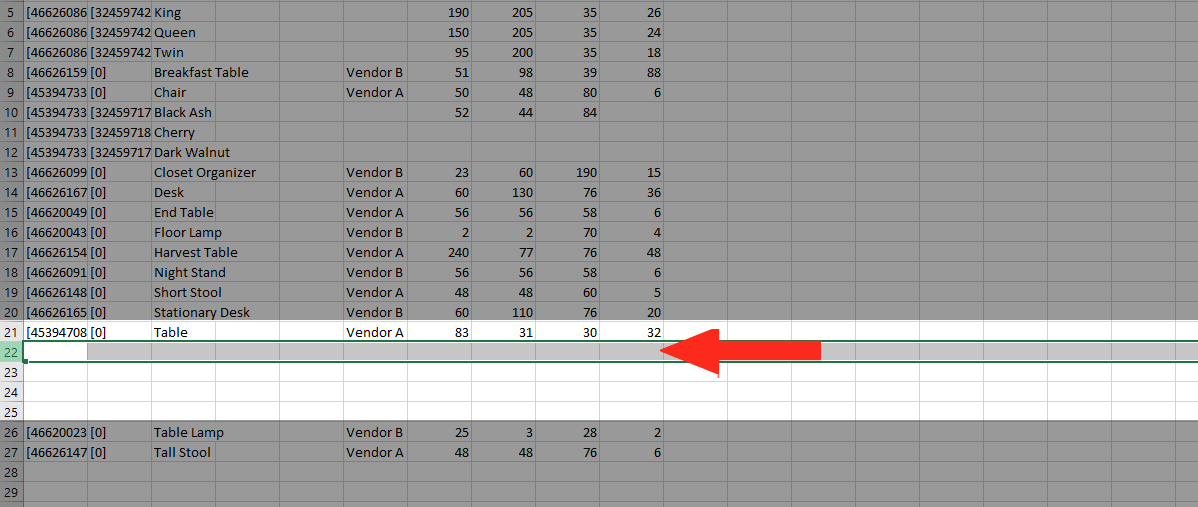
3) Under column C, enter the Title of each additional piece.
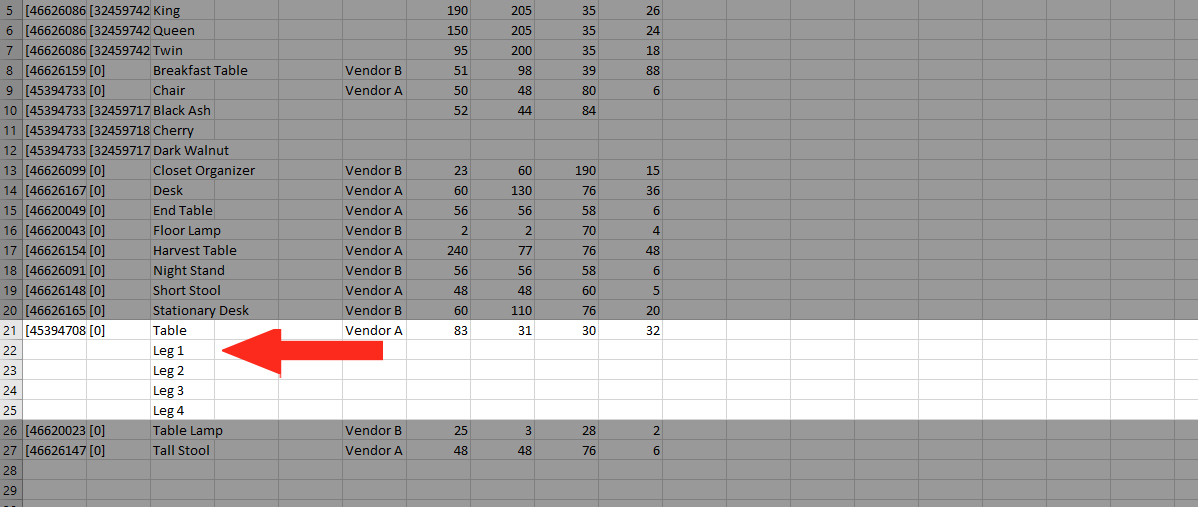
4) Under columns G, H, I and J respectively, enter the Length, Width, Height and Weight of each additional piece.
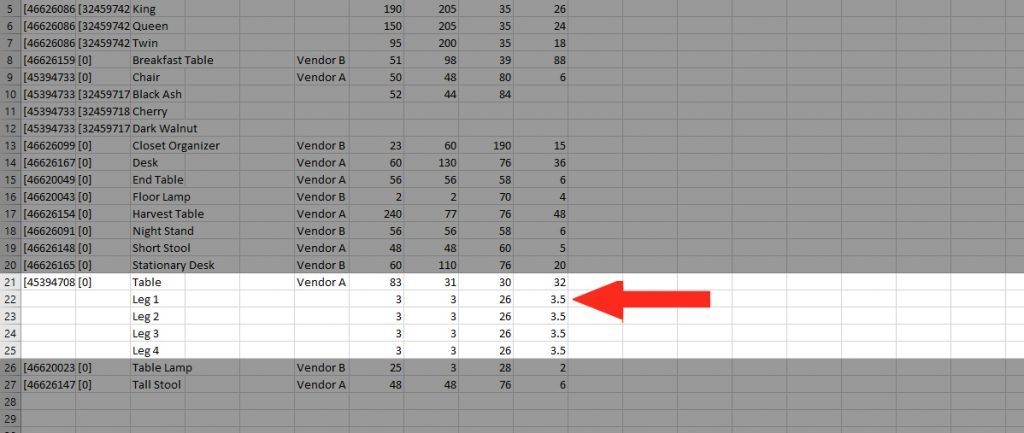
5) Save the CSV file. Remember the file name and folder location where the file is saved.
6) Follow the steps to import your product dimensions.
What’s Next: Add A Package